horz1

Saturday, September 22, 2012

LG RH-1988HS

Yes I know (and agree) ... this is NOT HIFI (in any manner or form)! Best qualified hifi usage is only as a "poor man's" transport.

The only reason I am posting the item here to save all the (other) poor soul's from being tormented  by the long or many  "PLEASE WAIT"  display issue (seems to be quite common when I performed a search on the net). I would like to contact the webmaster of a LG DVD-HDD website for consideration to add the following to his list but there was no contact listed there.

Our RH-1988HS has been working fine till recently when the "PLEASE WAIT" message was being displayed more and more often!!! Shortly thereafter, the LG stopped recording properly and would shutdown within seconds after start-up e.g as if it got hit by a PC virus??? Or it would only recording material in intervals of seconds!!!

LG RH-1988HS on top of another HDD-DVD recorder

After much Google-ing, found the solution after searching the net on good old YouTUBE!

Suggested steps to fix the issue are:-

1. Note your programmed recording schedule
2. Power off the unit
3. Remove the top casing
4. Check the capacitors on the PSU board (located behind the HDD)
5. Put your finger on the top of each of the larger capacitors to "feel" for bulging e.g the 2200uF(s)
6. Remove the PSU board from the chassis and perform the replacement, once you have the necessary capacitors. I used Rubycon(s) of the same spec(s)
7. Return the PSU board with all the necessary connections
8. Power-up
9. Set the clock and re-enter the recording schedule(s)

Took the opportunity to replace all three 2200uF capacitors on the PSU board even though only two were deformed.
After removing casing (PSU board on top LHS corner, board behind HDD)

After the 2200uF capacitors were replaced

Original capacitors which were replaced

In case anyone had venture into the recorders maintainence mode and made changes without recording the original values, these are the OPCODE settings for my recorder. Please note I purchased my unit in Singapore. OPCODE(s) are different for other regions and countries. Please search the net if your unit is not for distribution in Singapore.

OPCODE(s) for my recorder
And for those interested to make your unit region free, please refer to http://www.videohelp.com/dvdhacks//8176 . Basically you need to repeat pressing the '0' 7x twice.

Saturday, September 1, 2012

Philips CD-380

Was helping my friend dispose of his CDP and he was ok for the following post in my blog.

The CD380 is a CDM4/19 based CDP without built-in remote capability. This particular model uses a TDA1543 DAC.

The CD380 can be remote capable via an external unit from Philips and connecting it via the RC5 RCA connectors. Unfotunately the external remote unit are extremely rare.

Front view

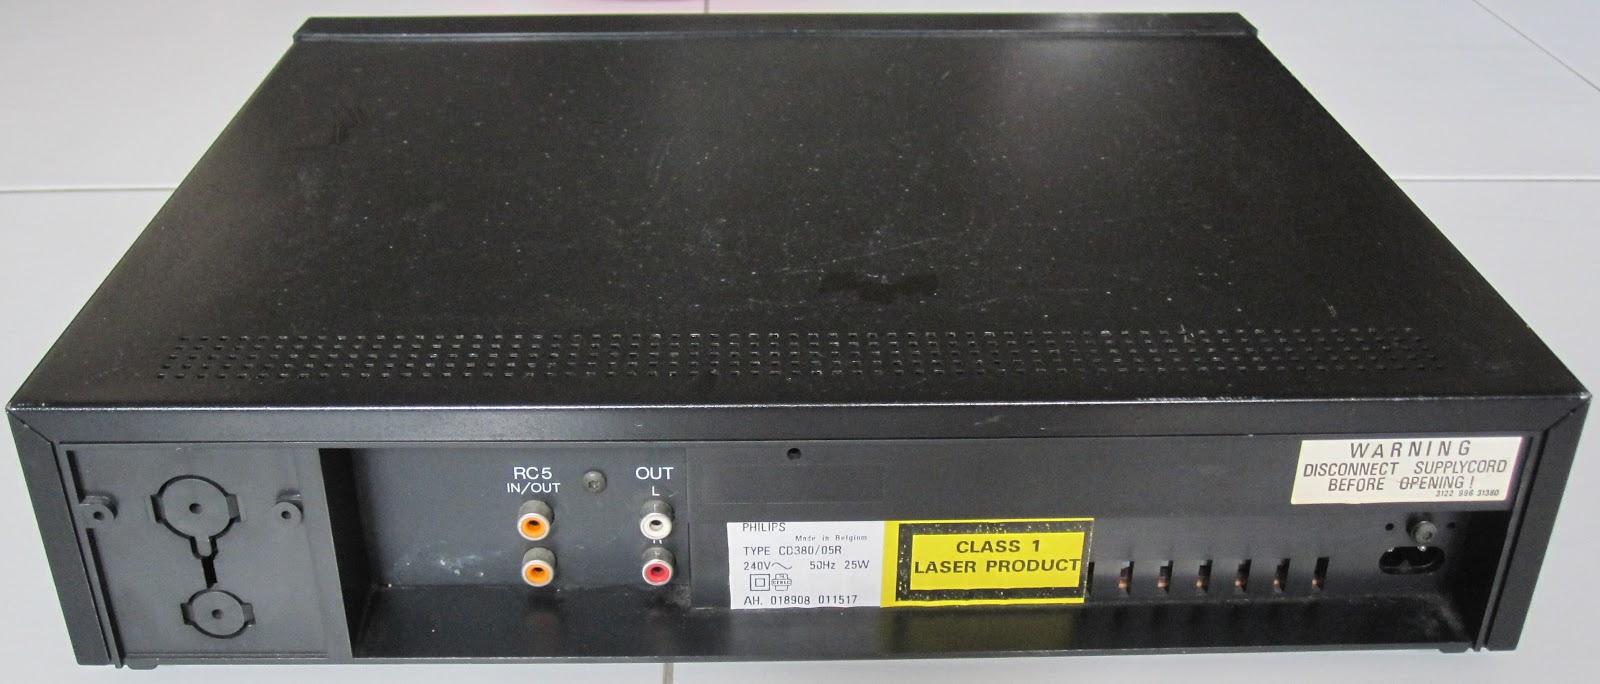
View from rear

Internals from top
The CD380 has no issues reading CD-R as well as my test CD with a degraded "see-thru" area on the TOC (Table of Contents).

How does this old gal sound? Pretty good actually for a stock unit which uses the "poor man's TDA1541"! Audio was warm and pleasant. Background details were good as well. Output via RCA(s) were low in volume. There is no volume control on the headphone output.

As  per other Philips CDP(s), the CD380 has potential to sound much better if the capacitors were refreshed and replaced with better quality components.

Wednesday, July 18, 2012

Meridian 209

The 209 is my Meridian remote to control the 201 and 602. The 204 is only activated by the 201 when utilised, and, vice-versa. The 209 has no other control over the 204.


Top


Bottom


After bottom cover removed
After insulator removed

The 209 literally eats 9V batteries for breakfast!!! Hence I had the remote codes programmed into the Philips Pronto and used it as my main remote for the Meridian components.

Sunday, July 1, 2012

Sansui B-2102

The B-2102 is the companion for the C-2102 pre-amp and is a X-Balanced System power amp.

Front view of the B-2102
There seems to be little information on the internet for the B-2012. I can confirm the B-2102 specification is similar to the B-2101. Main differences are that the B-2102 is a B-2101 with a different facade, large caps of 8,200uF instead of 10,000uF. Lastly the DISPLAY OFF switch only disables the audio feed into the meters - does not switch the meters off. Like the B-2101, the B-2102 is a scale-up version of the G90X amplifier section - with 8 transistors per side vs 8 transistors for both channels on the G90X.

Recapped the B-2102 a few years back as it was sounding dull. Came across across leaked caps on the PSU board with many very tired caps on the power amp boards. Used Panasonic ECA, FC and FM; Rubycon, Wima(s) and misc caps.

Bottom
Rear


Top with cover
Top with cover removed


Recap PSU and LHS driver board
Recap RHS driver board


8,200uF caps
Power amp board on one side


Details of the B-2101 are available on the web at specificationsbrochure-1 and brochure-2

I find the B-2102 to be sweeter than the B-2101 though the specifications are almost the same as the other model.

Friday, June 1, 2012

Pioneer A-400X

Recently a friend requested for assistance to help sell his A400X.


I sold my A400 and A400X yonks ago. Both the A400 and A400X are physically the same. I remember picking up the A400 and it was definitely heavier than the A400X. Other physical difference was the A400 had only speaker terminals for a pair of speakers while the A400X had terminals to bi-wire a pair of speakers. Both models has speaker protection circuitry.


Top view without cover

What I do remember is that the A400 sound close to the Cyrus1 while the A400X reproduction was closer to that of the Cyrus2. And when I had both the A400 and A400X to test with the Pro63 - the A400 was able to drive the Pro63 without issues. The A400X on the other hand manage to produce some squeals when the volume was between 1-2 o'clock!!! Even so, both models did not have issues driving my Celestion SL6S speakers.

Hence when I audition his stock A400X to ensure it was fully functional - my jaws literally dropped!!!

Let me explain.

When I had my A400X yonks ago, it had good high and mid-range reproduction but LF was disappointing. I did not realise my source was the issue then - a "well rated" Rotel CDP (which I later sold). Hence when I connected his A400X to my current setup - Meridian speakers with the Meridian 602/606 combination, the reproduction was SHOCKING - almost top-flight!!!

Seems the A400X is rather choosy and require a good source with good speakers to perform well.

Given the proper diet ... it is a rare and true bargin!!!


Saturday, May 5, 2012

Sony CDP-C245

The C245 is my only multi-CD player. It does not have any digital output - just the normal analogue RCA outputs.

Even so, don't be fooled by the stigma of a multi-CD player. Many of my visitors were surprised by it's capabilities (in stock form), especially when used in combination with the X10D.

Sony CDP-C245 with C-2102

The C245 accommodates up to 5 CD's in a circular carousel tray. After a CD has been played into the tray, you can load another by selecting DISC SKIP. When PLAY is depressed, the CDP starts checking for a loaded CD starting from LOC#1. The CD lens mechanism is located to right rear of the unit.

Sunday, April 1, 2012

Sansui B-2101

Missed the amp after it last seen day light ... about 2 years ago!
Front view with meters on

Front view with meters off

The B-2101 is a 200W RMS per channel power amp with the X-Balanced technology. Basically a scaled-up version of the power amp section from the Sansui AU-G90X e.g 8 transistors per channel vs 8 transistors for both channels on the G90X.

My other Sansui power amp, the B-2102 is prety much the same as the B-2101, except the reservoir caps are smaller at 8,200uF instead of 10,000uF. Other non-audioable difference was the DISPLAY OFF on the B-2102 does not really switch off the display but disables the audio feed to the electronics. The B-2101 and B-2102 sound pretty close to the other.

I normally partner the B-2101 and/or B-2102 with the Sansui C-2102. There are slight differences between the C-2101 and C2102. The C-2101 has more capacitors on the Parametric EQ motherboard (LHS if looking from front).

I had recapped it a few years back as the unit was taking over an hour to sound proper. In addition, the caps the in the PSU board had leaked, other caps on the power amp boards looked like they could do with a replacement after many years of service. Used the following EC(s) - Nichicon and Rubycon on the PSU board; Panasonic FC and FM on the driver and power amp boards. Some ceramics and polys were replaced with Wima(s) on the power amp boards. All replaced caps are of original values.

From top

Top view without cover

Close-up of one of the power amp sections

Close-up of one of the driver boards

In the past I had performed a test between the B-2101 vs the Meridian 557 in a all Meridian setup. The 557 excelled at vocals though the B-2101 has a wider dynamic range.

Uploaded the following brochure of the B-2101 as the information is scarce on the internet.


Can't wait to setup horizontal bi-amping with the B-2101 and B-2102 after the superb results with bi-amping the Quad 303(s)!!!

Now where did I put the B-2102 - was not in the storeroom where I was expecting it to be???

Wednesday, March 28, 2012

Brochure on Sansui X-Balanced System

Decided to upload pages from the brochure as information on the X-Balanced System seem to be scarce on the internet nowadays.

Part 1
Part 2

Friday, March 9, 2012

Meridian 201

Was searching for something in my store room when I came across the 201.

Front, in stand-by mode

Rear

A favourite among Meridian enthusiasts, the 201 cames in a handy compact package with remote capabilites. 

Like other 200-series units, it was designed to be left connected to the mains and goes into a Stand-by mode when turn off via the 209 (aka the flat brick of a remote which eats 9V batteries for breakfast!).


The 201 is a nice, natural sweet sounding pre-amp which can be matched with a variety of non-Meridian equipment. 

Only had the PSU section recapped since it has seen many years of service.

When they do appear on the resale market, normally goes pretty fast.

Saturday, February 11, 2012

Bi-amping with the Quad 303(s)

Finally had the time to bi-amp the Quad 303(s).

Researching the service manuals and inspecting the DIN socket on the 303 reveal the following pin configuration.

Front view with DIN pin numbering
From the manual


There are two popular bi-amping configurations - standard bi-amping (or horizontal bi-amping) and vertical bi-amping. Borrowed the handy illustrations below from the internet.


I decided to proceed with vertical bi-amping. Vertical bi-amping requires two amplifier of similar configuration (as close as possible). I cable the interconnect with output from the Quad 33 LEFT channel to the LEFT&RIGHT for one of my Quad 303. Likewise for the RIGHT channel using my other Quad 303.
Overview of bi-amp setup

View from top of the cabling

Side view
Cabling was completed using three Deltron 4-pin DIN plugs, recycled (normal) phone wire and my handy speaker cables. Normal phone wire??? Yes, many of my visitors were very surprised at its excellent quality (not reveal to them initially). They couldn't believe their ears till they listen for a while and wanted to know what cabling was deployed!!!!

Cost of the experiment was about $20 with the Deltron plugs accounted for most of the cost.

There's definately improvement in the presentation - the soundstage presence, vocals and instruments are much much better defined and realistic; so much so took some getting used to??? At low volumes, the sweet spot sounded like using a single 303 in stereo mode. When the volume was turned up, the sweet spot "grew". At the usual listening position, it was as if I was seated much closer to the speakers. Guess the 303's were having an easy time driving my Meridian A500 speakers (89dB)?

Actually sounds quite divine!!!

Highly recommended for Quad 303 enthusists who want more from their old faithful.

I used my 1st Quad 33 to drive the 303's.

FYI: One of my recent visitors actually inspected the 303's to make sure there were no valves in them!!!

Saturday, January 14, 2012

DIY portable fan unit for amplifier

Since I had the Sansui AU-9900A in the hall, decided to explore a DIY portable fan for the unit as it runs alarming hot.

Discovered there were two variaties of fans - AC and DC. DC type fans are those commonly found in your PC and tend to be less noisy but required an external transformer unit to function. AC fans run straight off the wall socket and usually more capable than their DC cousins but noiser as well.

My first experiment was using DC fans which were borrowed from my home desktop PC. These were quiet but several fans were required to provide effective cooling for the amp. The noise level for the fans were surprisingly low at just  above 40dB (via noise meter app on my iPhone)!!!
AC fan
Next experiment was to use an AC fan - noisy at about 80dB with the bare fan sitting on top of the amp. Placing the AC fan on a plastic platform was slightly better at just over 70dB.

My next attempt was much more successful. I used a ice-cream container (with foam) to house the AC fan within. Doing so reduce the noise level to just above 40dB!?! Noise from the AC fan was hardly noticable from 6 feet away. The amp was only slightly warm after 6 hours of continuous use.

Will update once I have time to experiment further.

Top view

Bottom view
DIY AC Fan pilot